
 AI · AI-generated
Excavation & preparation
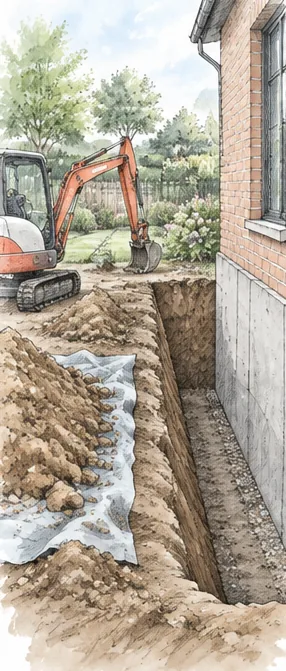
We expose the basement wall down to the foundation, clean it and repair joints, cracks and defects.
Damp basement walls, salt marks, a musty smell: we expose the wall, waterproof it from the outside, lay drainage where needed and then put your garden back in order. One firm does it all.
A damp basement can have many causes, but in older houses it is often the same one: the waterproofing on the outer wall has aged or was never good enough. Water from the ground then gets into the masonry and rises. It leaves stains, efflorescence and stale air behind.
External waterproofing tackles the problem exactly where the water attacks. It keeps water away from the masonry instead of merely hiding it on the inside. The masonry can then dry out, and the basement becomes usable again.
Most of the effort lies in the groundworks. The wall has to be exposed down to the foundation, often alongside patios, paths and beds. This is exactly where our strength lies.
We handle groundworks, drainage and landscaping ourselves, so you do not have to coordinate three firms. And at the end your garden looks the way it did before, or better.
You open the basement door and you know straight away. It smells musty, the render is flaking at the base of the wall and white salt marks show on the walls. Cardboard boxes go soft, tools rust, and the idea of using the basement as a hobby room or study slips out of reach. Many homeowners live with it for years, set up a dehumidifier and hope it will not get worse.
This is a familiar picture in Hamburg and the surrounding area. Many estate houses built between the 1950s and the 1970s were sealed with simple bitumen coatings. After decades in the ground these are brittle and cracked. On top of that come clay soils, where rainwater builds up against the wall, and in places high groundwater levels near the Elbe, the Alster and the marshes.
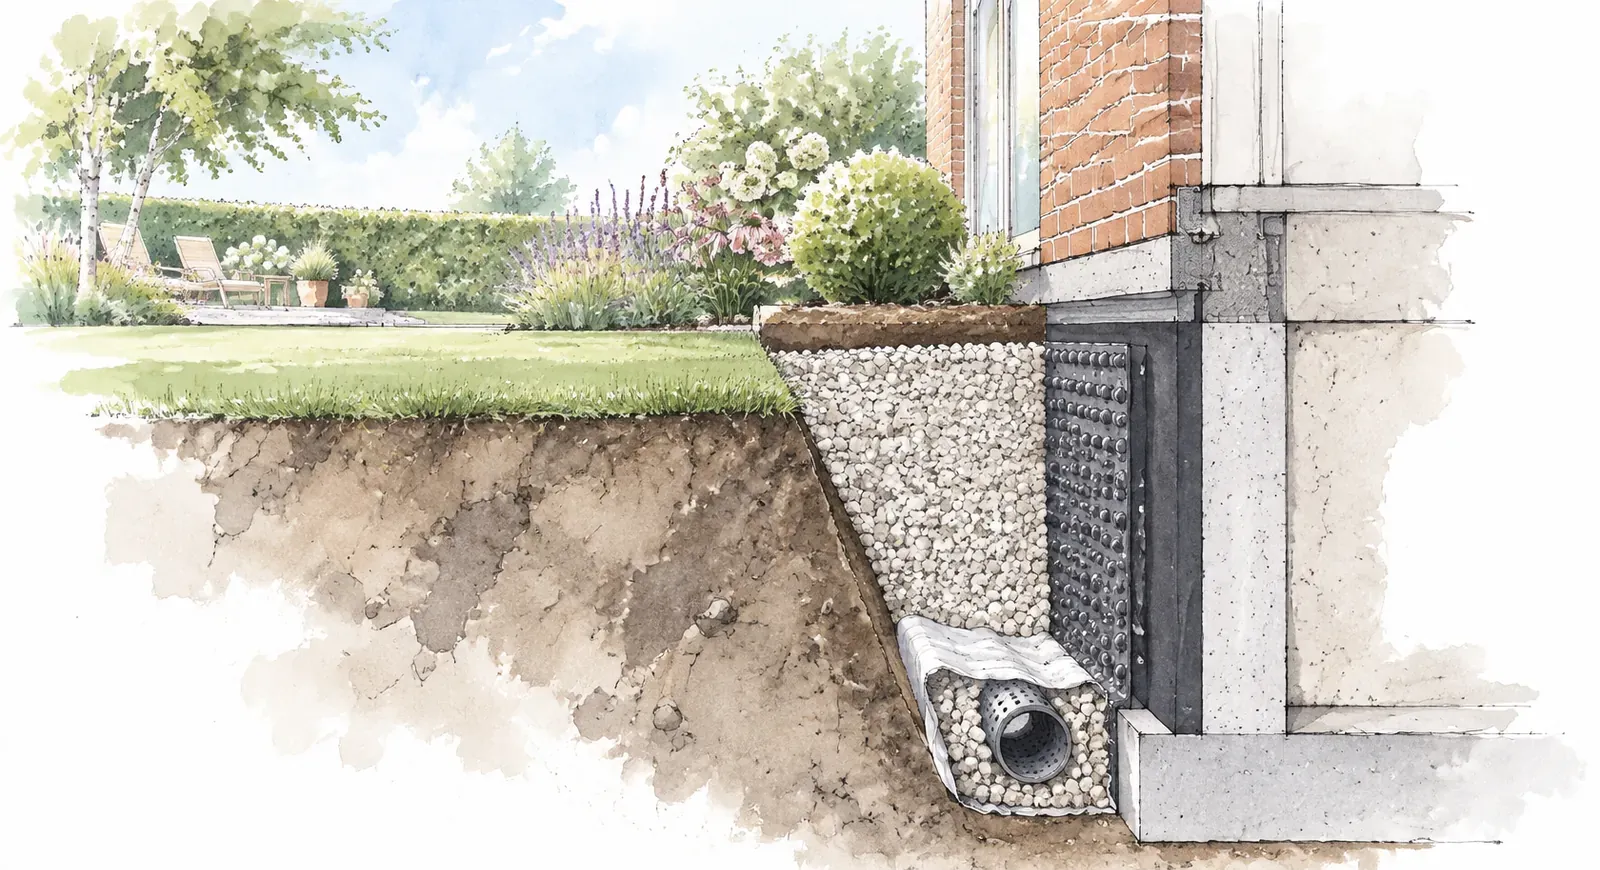
From the inside out: these layers give the basement wall lasting protection against damp.
 AI · AI-generated
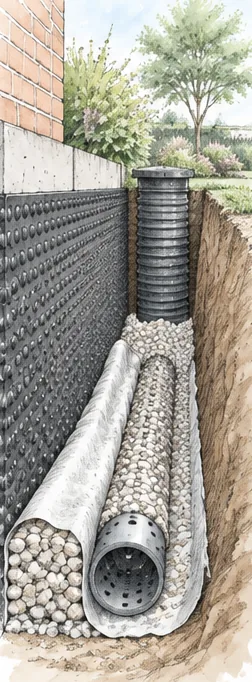
The exposed basement wall receives a waterproof coating, which a dimpled drainage membrane protects from damage. At the foundation, a drainage pipe bedded in gravel and wrapped in filter fleece carries the water away. The trench is then backfilled with free-draining material and the garden is reinstated.
The cleaned and repaired wall is given a coating that stays flexible for the long term, such as a thick bitumen coating or a mineral sealing slurry.
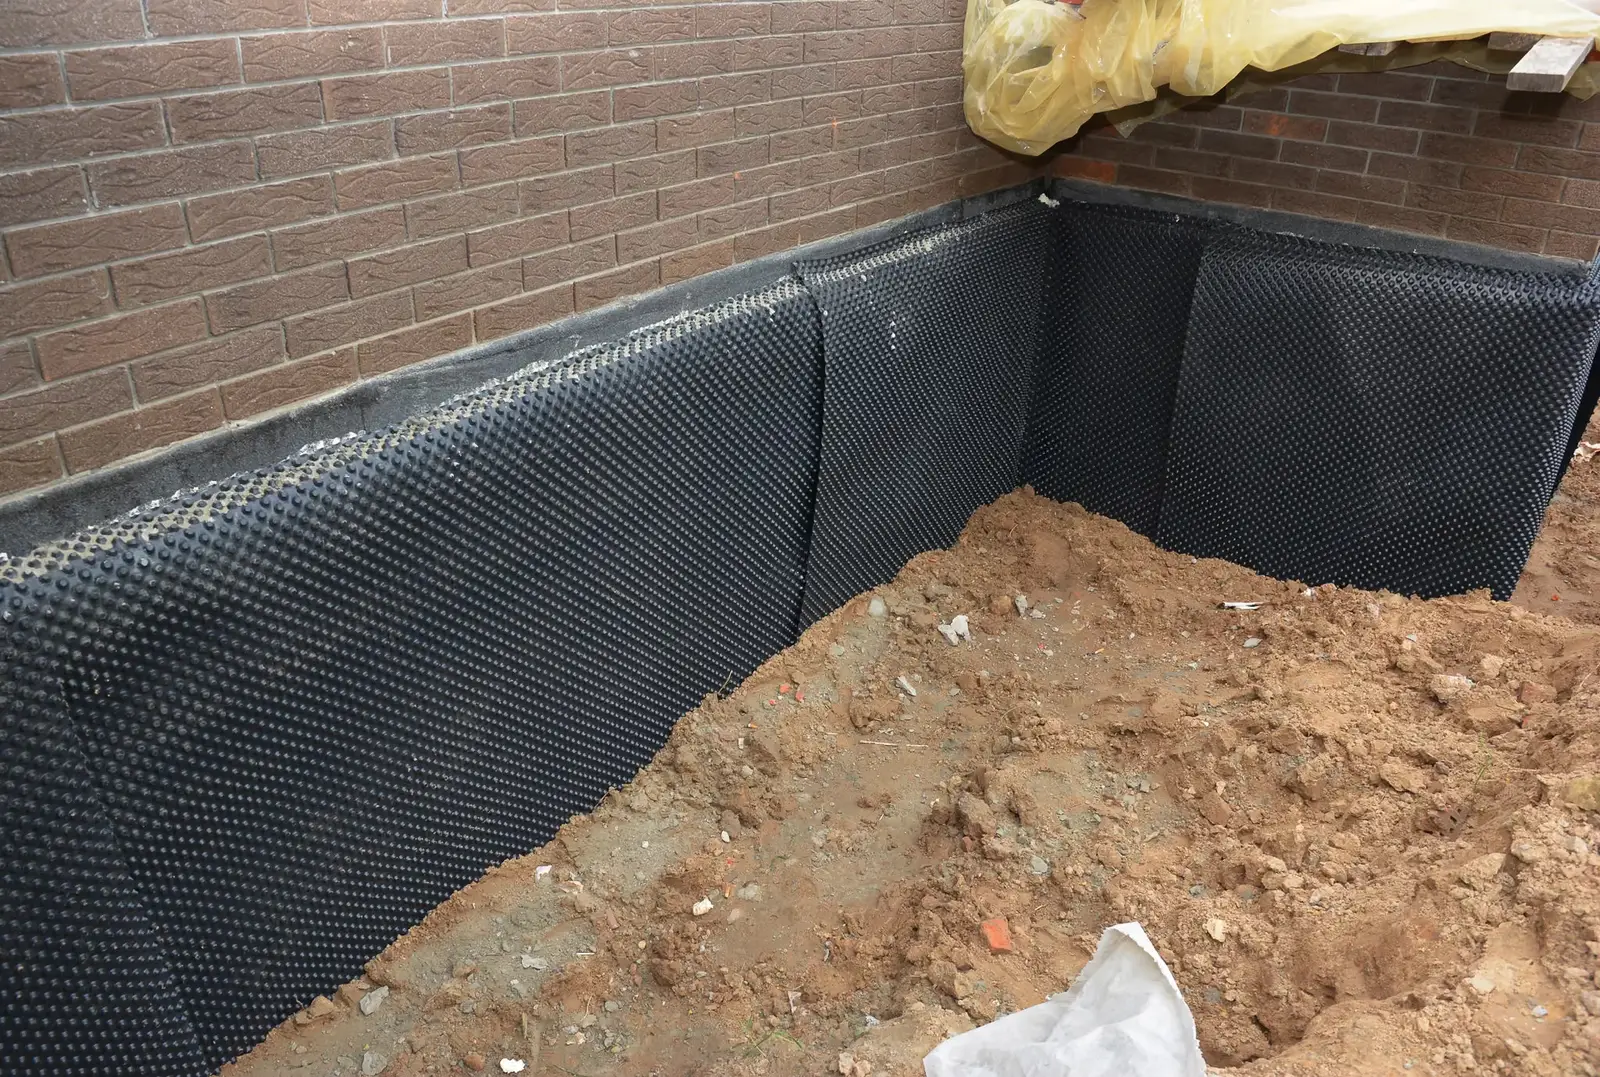
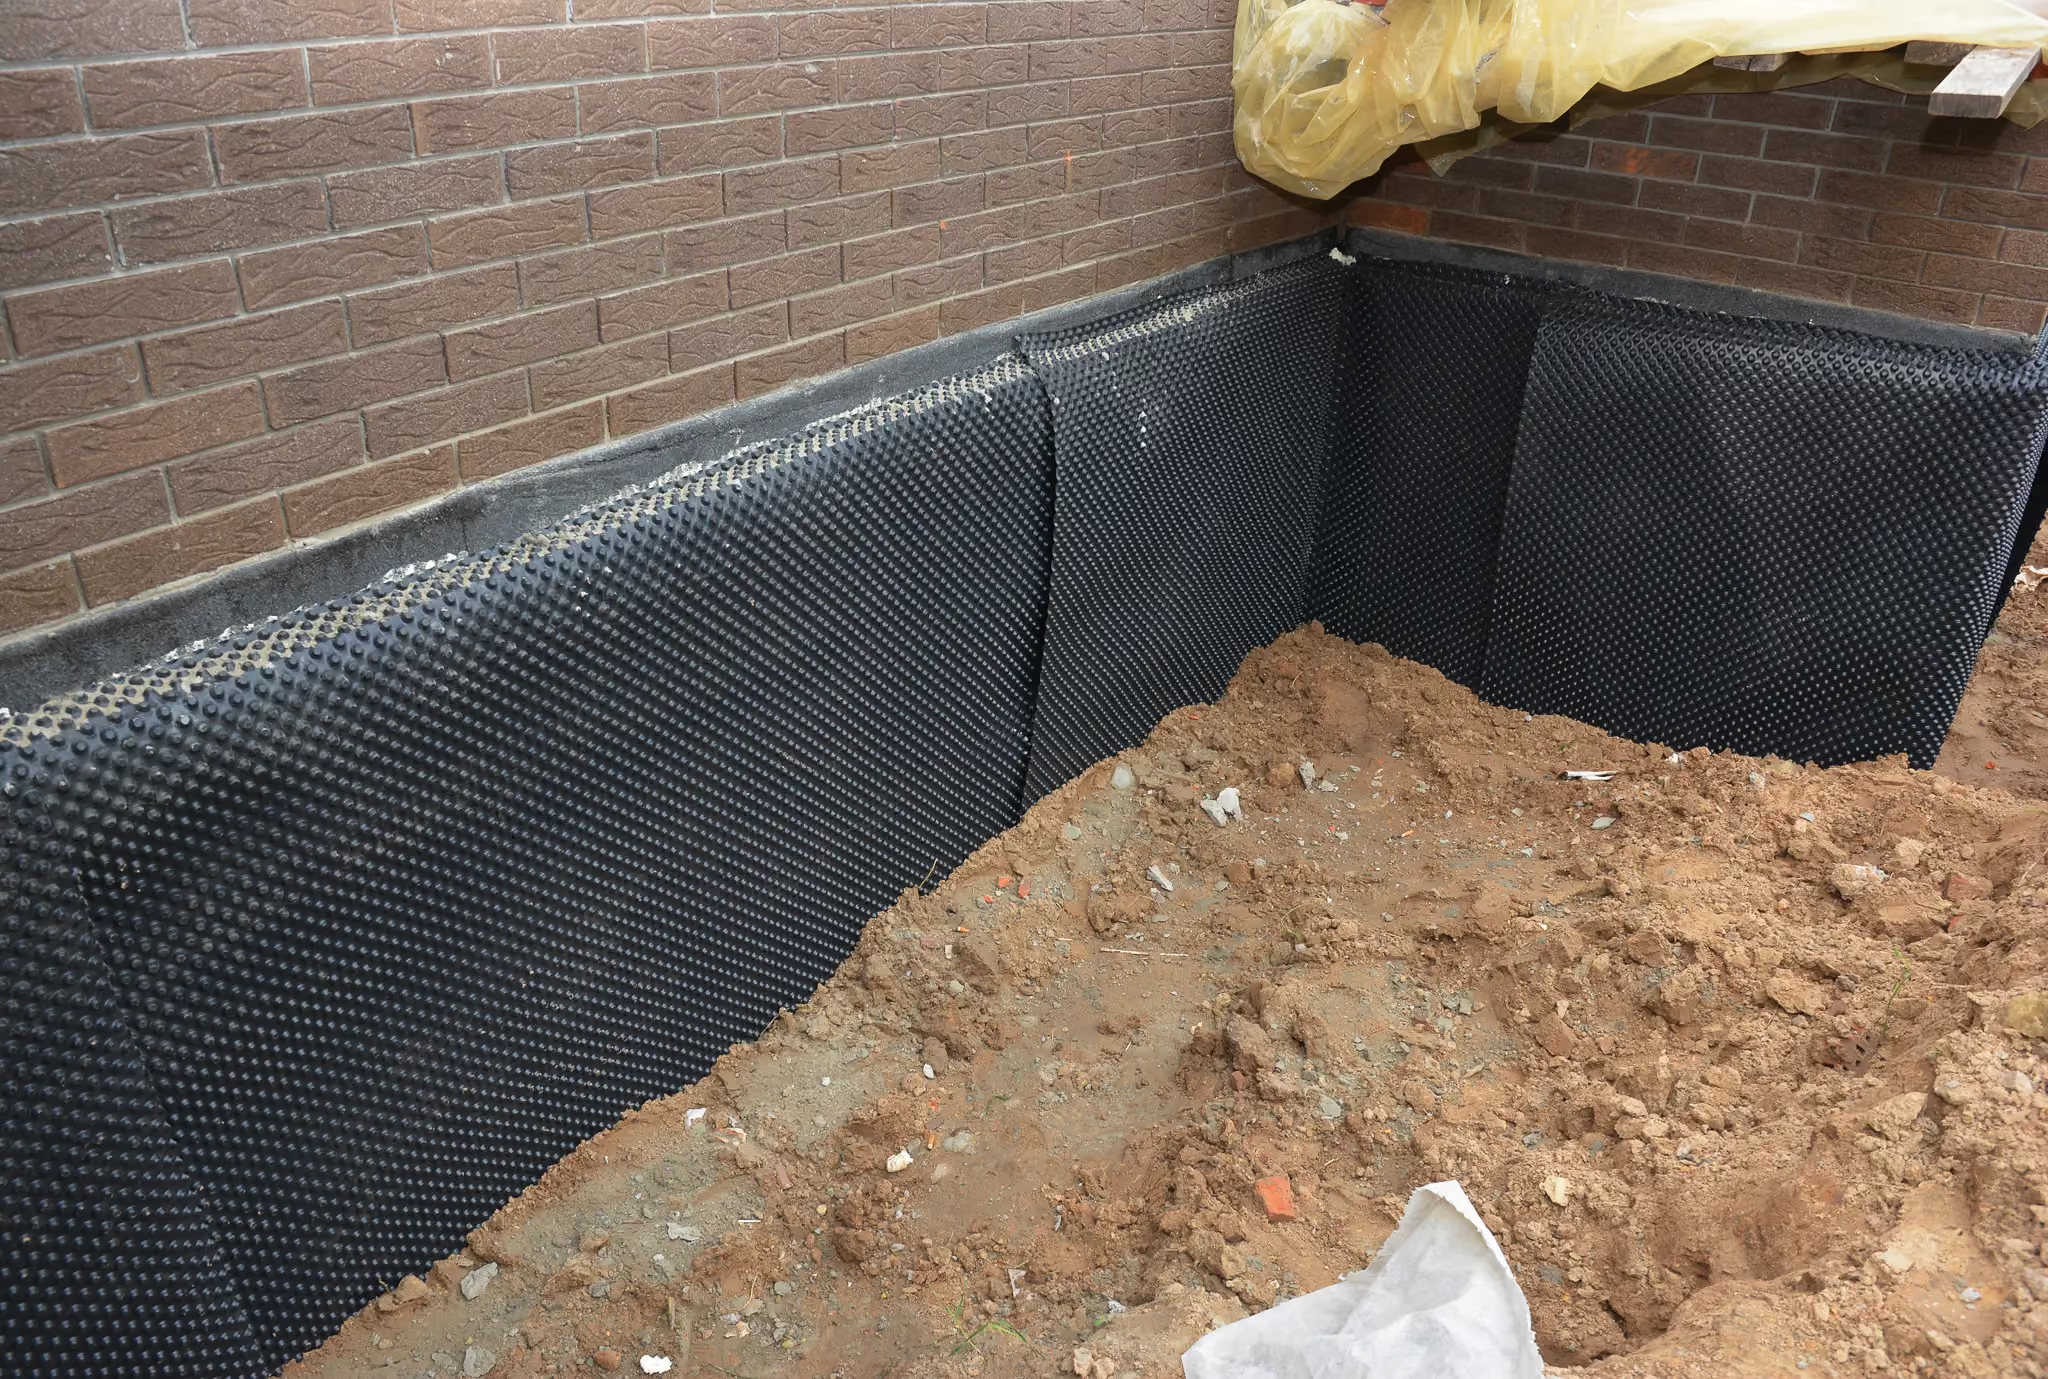
A dimpled drainage membrane or protection board shields the waterproofing from stones and pressure during backfilling. It can be combined with insulation on request.
Where water builds up in the soil, a drainage pipe in gravel and filter fleece leads it away from the foundation to a chamber or an infiltration system.
In Germany, the waterproofing of building elements in contact with the ground is governed by the standard DIN 18533. It defines water exposure classes. Put simply: how hard and for how long does water press against the wall? That decides which material is needed and how thick the layer has to be.
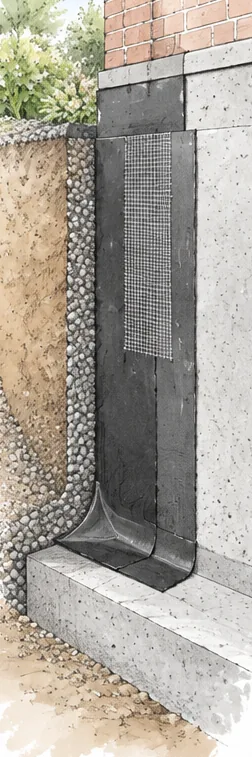
Common materials are polymer-modified thick bitumen coatings, often called KMB or PMBC, and mineral sealing slurries. The product is only part of it. Workmanship matters just as much: a sound, clean surface, a rounded fillet where the wall meets the foundation, and an even layer that is thick enough.
AI · AI-generatedWe expose the basement wall down to the foundation, clean it and repair joints, cracks and defects.
 AI · AI-generated
The wall is professionally waterproofed to suit the water exposure on site, including a rounded fillet at the foundation.
 AI · AI-generated
Where needed, we lay drainage in gravel and filter fleece, with flushing and inspection chambers.
 AI · AI-generated
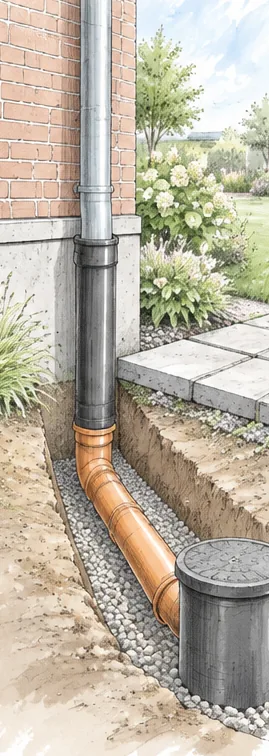
We reconnect downpipes and pipework and lead rainwater safely away from the house: into the sewer, a soakaway or a rainwater tank.
 AI · AI-generated
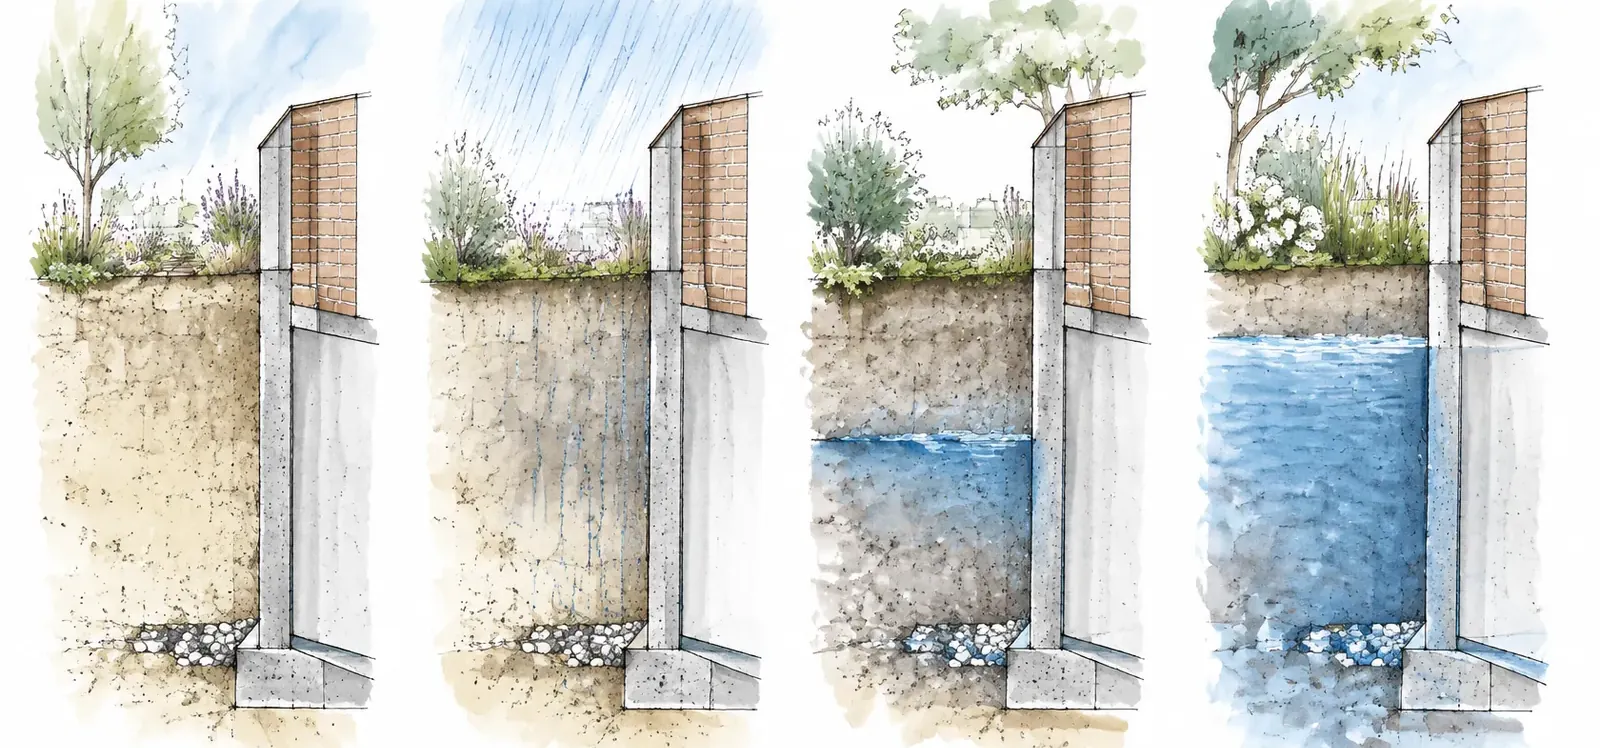
How elaborate the waterproofing has to be depends on the water exposure: ground moisture in free-draining sand, seepage water after rain, water held back in clay soils, or groundwater under pressure. That is why we check the soil and the groundwater level first.
Ground moisture, seepage water after rain or water held back in clay soils gets into the masonry through defective waterproofing.
Condensation from poor ventilation, faulty pipes or rising damp where there is no damp-proof course need different solutions. We clarify this beforehand.
Drainage carries away water that collects in front of the wall, using a perforated pipe in gravel and filter fleece. It takes the load off the waterproofing but does not replace it. Planning and installation have their own German standard, DIN 4095. What matters most is where the water goes: into an inspection chamber, an infiltration system or, where permitted, the sewer. Drainage with no proper outlet does more harm than good.
Important: Where groundwater is high, drainage must not lower the groundwater level permanently. These cases need waterproofing designed for water under pressure, agreed with the responsible authority.
Surprisingly often, part of the problem is not in the wall but a few metres away: a leaking downpipe connection, a blocked bend in the underground drain, or a patio that slopes towards the house. Every time it rains, water then runs exactly where it should not. We always check these points too and renew connections while we are there.
Not every damp basement needs external waterproofing. Sometimes the cause lies somewhere else entirely. In summer, warm, humid outdoor air flows in through a basement window left ajar and settles on the cool walls. That is condensation, not water coming in. Proper ventilation then helps more than any excavator. In other cases a faulty gutter or a patio sloping the wrong way is to blame, sending water straight to the house wall.
So before anyone digs, we take a close look at the damage. Where does the damp show, at what height, and at what time of year? Are there salt deposits, flaking render or water on the floor? Which way does the ground slope, and where do the roof and paved areas drain to? In unclear cases we recommend bringing in a building surveyor. That costs less than repairs in the wrong place.
Which waterproofing is needed depends on exactly this classification. DIN 18533, the standard for building elements in contact with the ground, defines several water exposure classes, from ground moisture to water under pressure. The higher the exposure, the more elaborate the build-up. A repair designed for ground moisture will not hold back water under pressure. That is why the diagnosis always comes first.
Quick self-test: Tape a piece of aluminium foil to the damp wall so that it is airtight. If the room side of the foil is wet after a day or two, it is condensation. If the wall side is wet, the damp is coming from the wall.
Waterproofing is only as good as its weakest point. These are the mistakes we see most often on repair jobs.
If you waterproof without knowing the cause, you may end up fighting the wrong problem, such as condensation instead of ground moisture.
No waterproofing bonds for long to loose render, dirt or open joints.
Without a dimpled drainage membrane or protection board, stones damage the fresh waterproofing during backfilling.
If the trench is backfilled with heavy clay again, water builds up at the wall once more. Free-draining material belongs next to the wall.
We look at the basement, the outer wall, the ground levels and the drainage, and work out where the damp is coming from.
We decide on the waterproofing, the drainage and the sequence of work, and plan how the patio, paths and beds will be protected or taken up.
We expose the basement wall section by section down to the foundation and secure pipes and cables.
We clean and repair the wall, form the fillet and apply the waterproofing in the required thickness.
We fit the protective layer, lay drainage where needed, connect the downpipes and backfill in layers.
We reinstate paving, paths, lawn and beds. If you like, we redesign them at the same time.
Not every damp basement needs external waterproofing. So the first question is about the cause: is the water coming from outside or from below, or is it condensation forming in the room?
For complex damage, structural questions or water under pressure, we recommend having a building surveyor oversee the work. We are happy to work alongside them.
Basement waterproofing is a job that needs good organisation. We work section by section so the house stays structurally stable, we secure deep trenches, and we make sure you can get into your home at all times.
And afterwards? The basement needs time to dry out, several months depending on the wall. Regular ventilation, ideally in the cooler months, speeds this up considerably.
Moisture readings and a check of the drainage help to narrow down the cause before any digging starts.
The cost depends mainly on the length and depth of the wall to be exposed, the condition of the masonry and what lies in front of the wall. After the site visit you receive a quote listing every item.
Basement waterproofing always means disturbing the garden. Many homeowners make the most of it: the old patio is replaced with a new one, the path round the house gets a fresh surface and the beds are replanted.
Because we do the groundworks ourselves, plans like these can be built in without extra effort.
More about groundworks ⟶When moisture from the ground gets through the outer basement wall, for example because the old waterproofing is missing or damaged. We clarify the cause beforehand.
Not always. It is often enough to expose and waterproof the affected sections of wall.
Usually a few days for one side of the house and one to three weeks for a whole house, depending on depth, weather and reinstatement.
Drainage makes sense where water builds up in the soil, for example on clay. In free-draining sand it is often not needed.
They are taken up and reinstated once the waterproofing is done. If you like, we redesign them at the same time.
From spring to autumn, when the ground is not frozen and the waterproofing can be applied in dry weather.
It can be a solution where digging outside is not possible. The masonry stays damp, though. External waterproofing is usually the more lasting fix.
In Hamburg, mainly in the west and north, and in the Pinneberg district: Pinneberg, Halstenbek, Rellingen, Wedel, Quickborn, Schenefeld and Tangstedt.
Tell us briefly where the damp is. We will come round, look at the basement and the outside area, and talk through the right solution with you.